Interceptor란 Filter와 매우 유사한 형태로 존재하지만, 차이점은 Spring Context에 등록된다는 점이다.
AOP(Aspect Oriented Programming)와 유사한 기능을 제공할 수 있으며, 주로 인증 단계를 처리하거나, Logging을 하는 데에 사용한다. 이를 선/후 처리 함으로써, Service business logic과 분리시킨다.
이번 실습에서는 public과 private한 controller를 만들어서 세션을 검사해서 인증된 사용자만 private한 class에 접근할 수 있도록 할 것이다. 구조는 다음과 같다.

package com.example.interceptor.controller;

import org.springframework.web.bind.annotation.GetMapping;
import org.springframework.web.bind.annotation.RequestMapping;
import org.springframework.web.bind.annotation.RestController;

@RestController
@RequestMapping("/api/public")
public class PublicController {

    @GetMapping("/hello")
    public String hello() {
        return "public hello";
    }

}
package com.example.interceptor.controller;
import com.example.interceptor.annotation.Auth;
import org.springframework.web.bind.annotation.GetMapping;
import org.springframework.web.bind.annotation.RequestMapping;
import org.springframework.web.bind.annotation.RestController;
@RestController
@RequestMapping("/api/private")
@Auth // interceptor에서 다음 method 또는 controller에서 해당 어노테이션이 붙어 있으면 세션을 검사해서 있을 때만 통과
public class PrivateController { // 세션이 인증된 사용자만!
@GetMapping("/hello")
public String hello() {
return "private hello";
}
}
privateController에 적용한 어노테이션인 @Auth는 직접 작성했다.
package com.example.interceptor.annotation;

import java.lang.annotation.*;

@Documented
@Retention(RetentionPolicy.RUNTIME)
@Target({ElementType.TYPE, ElementType.METHOD})
public @interface Auth {

}
package com.example.interceptor.interceptor;
import lombok.extern.slf4j.Slf4j;
import org.springframework.stereotype.Component;
import org.springframework.web.method.HandlerMethod;
import org.springframework.web.servlet.HandlerInterceptor;
import org.springframework.web.servlet.resource.ResourceHttpRequestHandler;
import javax.servlet.http.HttpServletRequest;
import javax.servlet.http.HttpServletResponse;
@Slf4j
@Component // 스프링에 의해서 관리
public class AuthInterceptor implements HandlerInterceptor {
@Override
public boolean preHandle(HttpServletRequest request, HttpServletResponse response, Object handler) throws Exception {
String url = request.getRequestURI();
log.info("request url : {}", url);
return true; // true여야 안으로 들어가서 interceptor 처리를 하고 false이면 밖으로 return
}
private boolean checkAnnotation(Object handler, Class clazz) {
// resource, javascript, html,... check
if(handler instanceof ResourceHttpRequestHandler) {
return true;
}
// annotation check
HandlerMethod handlerMethod = (HandlerMethod) handler;
if(null != handlerMethod.getMethodAnnotation((clazz)) || null != handlerMethod.getBeanType().getAnnotation(clazz)) {
// Auth annotation이 있을 때는 true
return true;
}
return false;
}
}
interceptor 작성을 위해 package를 만들고 세션을 검사할 AuthInterceptor를 작성했다. HandlerInterceptor를 상속받는다. 이전에 실습한 것과 마찬가지로 body도 넘겨줄 수 있다. 하지만 애초에 filter 단에서 ContentCachingRequestWrapper을 만들어서 doFIlter에 넣어주면 같은 프로젝트 내의 interceptor에서는 preHandle의 request를 형변환 시켜줄 수 있다.

그림에서 보는 바와 같이 Filter 단에서 Interceptor로 넘겨주는 것을 확인할 수 있다.

Interceptor를 위해 config package를 만들고 MvcConfig class를 만들어 주었다.
package com.example.interceptor.config;

import com.example.interceptor.interceptor.AuthInterceptor;
import lombok.RequiredArgsConstructor;
import org.springframework.context.annotation.Configuration;
import org.springframework.web.servlet.config.annotation.InterceptorRegistry;
import org.springframework.web.servlet.config.annotation.WebMvcConfigurer;

@Configuration
@RequiredArgsConstructor // final로 생성된 객체들을 생성자에 주입받을 수 있도록 해준다.
public class MvcConfig implements WebMvcConfigurer {

    // @Autowired는 순환참조가 발생할 수 있으므로 @RequiredArgsConstructor를 사용하였다.
    private final AuthInterceptor authInterceptor;

    @Override
    public void addInterceptors(InterceptorRegistry registry) {
        registry.addInterceptor(authInterceptor); // interceptor 등록
    }
}
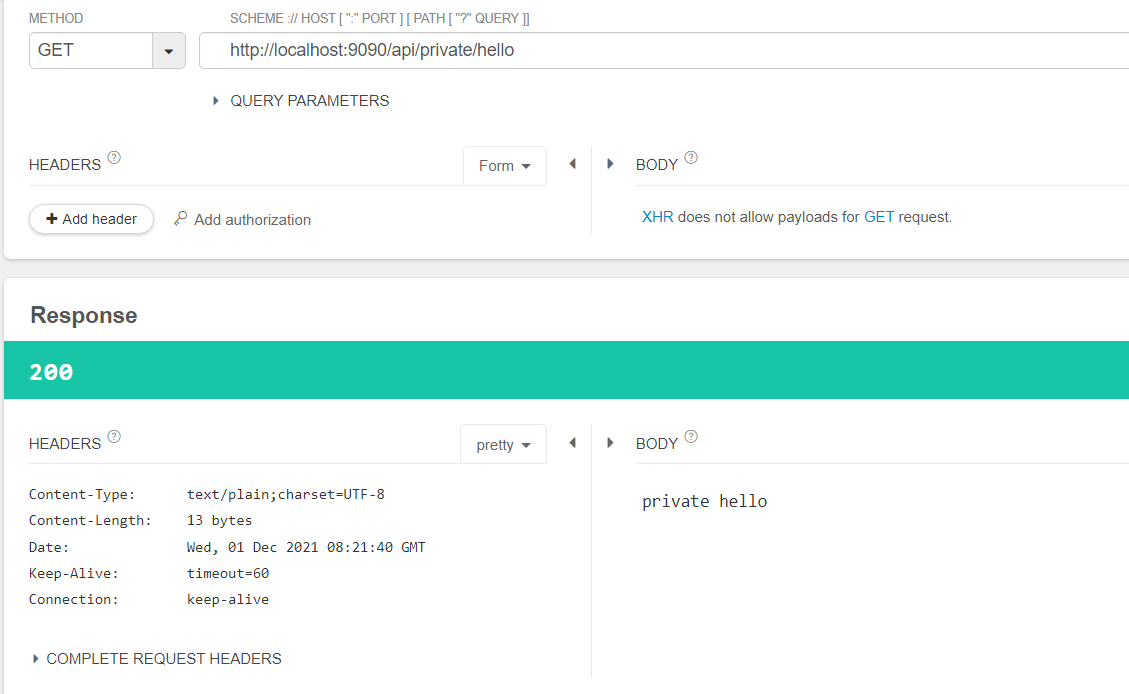
AuthInterceptor class에서 파생된 객체를 받아 addInterceptor()로 interceptor 등록을 할 수 있도록 했다. interceptor 등록을 하지 않으면 private과 public에서 세션 검사 없이 같은 결과를 호출할 것이다. 이제 실행하면 오버라이딩한 preHandle에 걸리면서 interceptor에 걸린 결과를 보여줄 것이다.
이번에는 권한 체크를 handler를 통해 interceptor에 걸어보도록 하자.
private boolean checkAnnotation(Object handler, Class clazz) {
        // resource, javascript, html,... check
        if(handler instanceof ResourceHttpRequestHandler) {
            return true;
        }

        // annotation check
        HandlerMethod handlerMethod = (HandlerMethod) handler;

        if(null != handlerMethod.getMethodAnnotation((clazz)) || null != handlerMethod.getBeanType().getAnnotation(clazz)) {
            // Auth annotation이 있을 때는 true
            return true;
        }
        return false;
    }
AuthInterceptor의 checkAnnotation을 통해 권한을 체크할 것이다.
URI uri = UriComponentsBuilder.fromUriString(request.getRequestURI())
                .query(request.getQueryString()).build().toUri();

        log.info("request url : {}", url);

        boolean hasAnnotation = checkAnnotation(handler, Auth.class);
        log.info("has annotation : {}", hasAnnotation);

        // 나의 서버는 모두 public으로 동작을 하는데
        // 단! Auth 권한을 가진 요청에 대해서는 세션, 쿠키 등등
        if(hasAnnotation) {
            // 권한 check
            String query = uri.getQuery();
            log.info("query : {}", query);
            if(query.equals("name=steve")) {
                return true;
            }
            return false;
        }
URI를 받아와서 hasAnnotation 변수를 받아와 checkAnnotation을 실행한 결과를 담도록 한다. if 문에서 받아온 권한체크 변수(hasAnnotation)가 true라면 uri에서 받아온 query를 넘겨주고 해당 쿼리 파라미터의 name, value값이 설정한 값과 동일하다면 true를 리턴하고 interceptor에 걸리게 한다. 아니라면 false로 리턴한다.


쿼리 파라미터에 제대로된 name과 value값을 넣어주니 true에 걸려 interceptor가 동작하여 PrivateController를 실행한 결과를 볼 수 있었다. 이번엔 제대로 된 값이 아닌 값을 넣어보도록 하자.


권한을 체크했을 때 쿼리 파라미터의 값은 있으나 제대로 된 값이 아니기 때문에 false를 리턴하고 interceptor에도 걸리지 않았음을 알 수 있다. 이제 잘못된 값을 던졌을 때 예외를 터뜨려보도록 하자.
우선 exception package를 만들고 AuthException class를 만든다.
package com.example.interceptor.exception;

public class AuthException extends RuntimeException {
	// Runtime 시에 발생
}
그다음 예외가 터졌을 때 적용시킬 handler를 위해 handler package를 만들고 GlobalExceptionHandler class 생성 후에 다음과 같이 코드를 작성한다.
package com.example.interceptor.handler;

import com.example.interceptor.exception.AuthException;
import org.springframework.http.HttpStatus;
import org.springframework.http.ResponseEntity;
import org.springframework.web.bind.annotation.ExceptionHandler;
import org.springframework.web.bind.annotation.RestControllerAdvice;

@RestControllerAdvice
public class GlobalExceptionHandler {

    @ExceptionHandler(AuthException.class)
    public ResponseEntity authException() {
        return ResponseEntity.status(HttpStatus.UNAUTHORIZED).build();
    }

}
마지막으로 return false를 throw new AuthException()으로 바꿈으로써 예외를 던질 수 있도록 한다.
마지막으로 필터(Filter)와 인터셉터(Interceptor)의 차이에 대해 알아보자. (밑의 내용은 '망나니개발자'님의 블로그를 참고하였습니다. 출처 : https://mangkyu.tistory.com/173)

[ 필터(Filter)의 용도 예시 ]
- 보안 관련 공통 작업
- 모든 요청에 대한 로깅 또는 감사
- 이미지/데이터 압축 및 문자열 인코딩
필터에서는 스프링과 무관하게 전역적으로 처리해야 하는 작업들을 처리할 수 있다.
대표적인 예시로 보안과 관련된 공통 작업이 있다. 필터는 인터셉터보다 앞단에서 동작하기 때문에 전역적으로 해야하는 보안 검사(XSS 방어 등)를 하여 올바른 요청이 아닐 경우 차단을 할 수 있다. 그러면 스프링 컨테이너까지 요청이 전달되지 못하고 차단되므로 안정성을 더욱 높일 수 있다. (인터셉터와 같이 handler라는 오브젝트는 다루지 않는다.)
또한 필터는 이미지나 데이터의 압축이나 문자열 인코딩과 같이 웹 애플리케이션에 전반적으로 사용되는 기능을 구현하기에 적당하다. Filter는 다음 체인으로 넘기는 ServletRequest/ServletResponse 객체를 조작할 수 있다는 점에서 Interceptor보다 훨씬 강력한 기술이다.
[ 인터셉터(Interceptor)의 용도 예시 ]
- 인증/인가 등과 같은 공통 작업
- API 호출에 대한 로깅 또는 감사
- Controller로 넘겨주는 정보(데이터)의 가공
인터셉터에서는 클라이언트의 요청과 관련되어 전역적으로 처리해야 하는 작업들을 처리할 수 있다.
대표적으로 인증이나 인가와 같이 클라이언트 요청과 관련된 작업 등이 있다. 이러한 작업들은 컨트롤러로 넘어가기 전에 검사해야 하므로 인터셉터가 처리하기에 적합하다.
또한 인터셉터는 필터와 다르게 HttpServletRequest나 HttpServletResponse 등과 같은 객체를 제공받으므로 객체 자체를 조작할 수는 없다. 대신 해당 객체가 내부적으로 갖는 값은 조작할 수 있으므로 컨트롤러로 넘겨주기 위한 정보를 가공하기에 용이하다. 예를 들어 JWT 토큰 정보를 파싱해서 컨트롤러에게 사용자의 정보를 제공하도록 가공할 수 있는 것이다. (어노테이션이나 클래스의 기능을 활용할 수 있다.)
그 외에도 우리는 다양한 목적으로 API 호출에 대한 정보들을 기록해야 할 수 있다. 이러한 경우에 HttpServletRequest나 HttpServletResponse를 제공해주는 인터셉터는 클라이언트의 IP나 요청 정보들을 포함해 기록하기에 용이하다.
'공부 > Spring boot' 카테고리의 다른 글
| AOP (0) | 2021.12.06 |
|---|---|
| IoC / DI (0) | 2021.12.05 |
| Spring Boot Filter (0) | 2021.12.01 |
| Spring Boot Exception 처리 (0) | 2021.11.29 |
| DELETE API (0) | 2021.11.26 |


